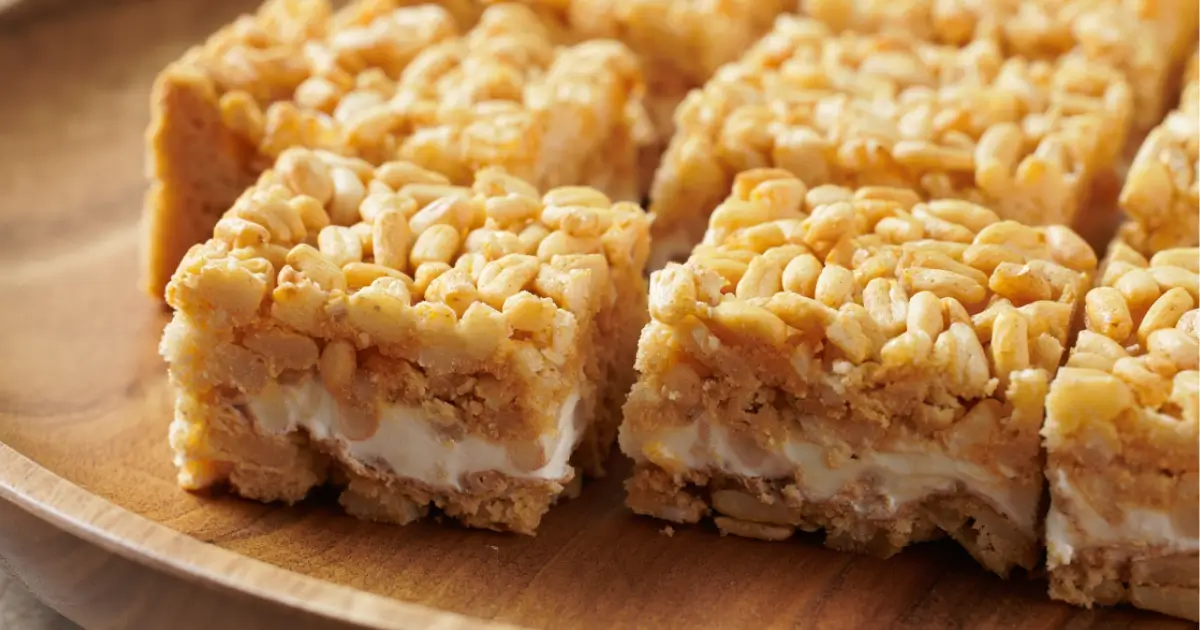
The Best Baked Rice Krispy Treats Recipe You’ll Ever Try
If you grew up loving classic Rice Krispy Treats, get ready to take things to a whole new level with Baked Rice Krispy Treats. This twist on the nostalgic no-bake snack turns out chewier, slightly crisp on the edges, and full of rich, buttery marshmallow flavor. Baking gives these bars a sturdier texture, making them perfect for parties, bake sales, or just as an anytime sweet treat.
In this recipe, I’ll walk you through every step of making the ultimate Baked Rice Krispy Treats, share ingredient substitutions you can use, offer some clever variations, and give you tips on storing leftovers so they stay fresh.
Table of Contents
Ingredients for Baked Rice Krispy Treats
You only need a handful of simple ingredients to whip up these baked marshmallow bars. Here’s the full list with measurements:
- 6 cups Rice Krispies cereal (or any crispy rice cereal)
- 10 oz (1 standard bag) mini marshmallows
- 4 cups mini marshmallows (separate from above, for folding in)
- ½ cup (1 stick) unsalted butter
- ½ teaspoon salt (optional, but balances sweetness)
- 1 teaspoon pure vanilla extract
- Cooking spray or butter (for greasing the pan)
Step-by-Step Instructions for Baked Rice Krispy Treats
Step 1: Prepare Your Pan
- Preheat your oven to 350°F (175°C).
- Grease a 9×13-inch baking dish with cooking spray or butter. For easier removal, line it with parchment paper and leave a little overhang on the sides.
Step 2: Melt the Butter and Marshmallows
- In a large saucepan, melt the butter over medium-low heat.
- Once the butter is melted, add the 10 oz bag of marshmallows. Stir continuously until the marshmallows are completely smooth and melted.
- Mix in the vanilla extract and optional salt at this stage.
Step 3: Mix in the Cereal
- Remove the pan from heat and gently stir in the Rice Krispies cereal.
- Fold in the extra 4 cups of mini marshmallows—these will create gooey pockets throughout the treats.
Step 4: Press into Pan
- Transfer the mixture to your prepared baking dish.
- Lightly grease your hands or use a buttered spatula to press the mixture evenly into the pan. Don’t press too hard—you want the bars to stay soft and chewy.
Step 5: Bake the Treats
- Place the pan in the oven and bake for 10–12 minutes. The edges will become lightly golden, and the marshmallows will puff slightly.
- Remove from the oven and let the bars cool completely in the pan.
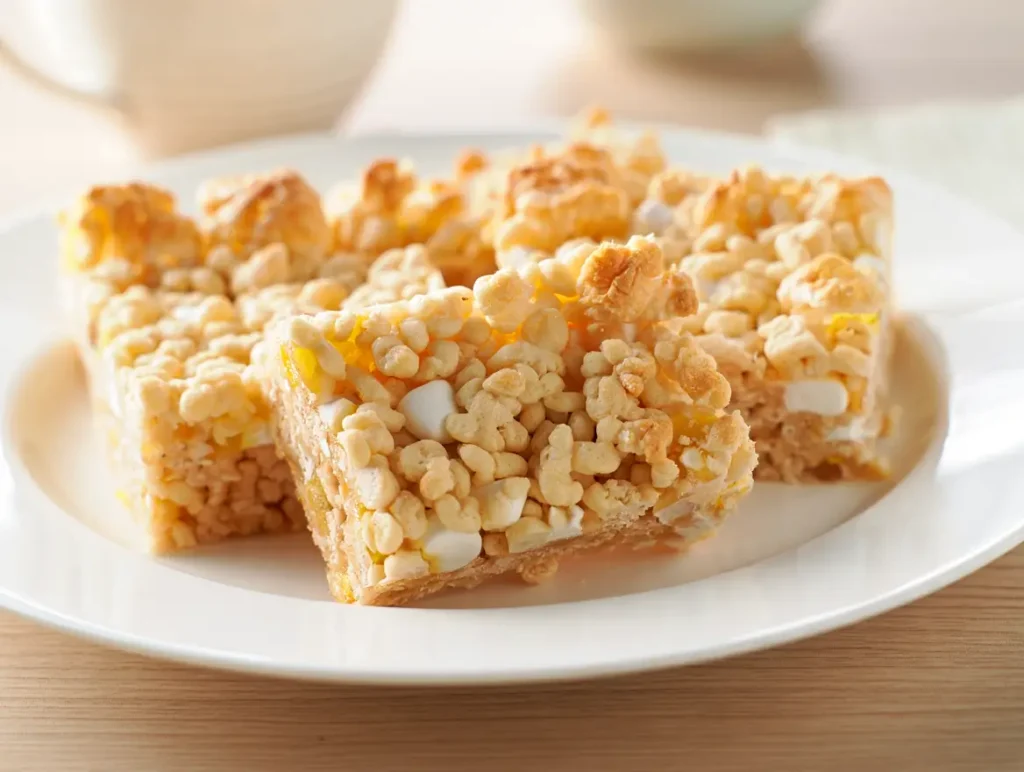
Step 6: Slice and Serve
- Once cooled, lift the treats out of the pan using the parchment paper.
- Cut into squares or rectangles with a sharp knife.
- Serve and enjoy your homemade Baked Rice Krispy Treats!
Tips for Perfect Baked Rice Krispy Treats
- Don’t over-bake: Just 10–12 minutes is enough. If you bake too long, the treats can become too firm.
- Grease everything: Marshmallows are sticky! Lightly grease your spatula, hands, or spoon to make pressing easier.
- Extra gooey bars: Add an additional ½ cup of marshmallows if you want them ultra chewy.
- Cutting clean squares: Spray your knife with a little cooking spray before slicing.
Ingredient Substitutions
One of the best things about making Baked Rice Krispy Treats is that you don’t have to follow the recipe to the letter. With just a few simple swaps, you can customize the flavor, texture, and even the dietary profile of your treats. Here are some creative substitution ideas to try:
Cereal Swaps
Rice Krispies are the traditional choice, but almost any crispy cereal works well.
- Cocoa Krispies: Add a chocolatey base for anyone who loves cocoa flavor.
- Fruity Pebbles: Bright, colorful, and perfect for a birthday party or festive twist.
- Cornflakes or Special K: Add a more subtle crunch for a slightly different texture.
- Cheerios: Create a heartier, less-sweet version with extra crunch.
Butter Alternatives
Butter gives these bars their rich flavor, but there are plenty of dairy-free or healthier alternatives:
- Margarine: A simple 1:1 swap for butter.
- Coconut oil: Adds a faint tropical flavor and works great if you want a dairy-free option.
- Vegan butter: Perfect for those avoiding dairy but still wanting the buttery taste.
- Nut butter: Stir in almond, cashew, or peanut butter for extra richness and protein.
Marshmallow Substitutions
Marshmallows are the star of the show, but here are ways to adapt:
- Large marshmallows: Chop them into quarters before melting so they melt evenly.
- Marshmallow fluff or creme: Works in a pinch if you don’t have mini marshmallows.
- Homemade marshmallows: For bakers who love making things from scratch, these can elevate the flavor and texture.
Flavor Boosts
Want to take your Baked Rice Krispy Treats up a notch? Try one of these tasty mix-ins:
- Peanut butter or almond butter: Adds creaminess and nutty flavor.
- Cookie butter (speculoos spread): A caramel-spiced twist that pairs beautifully with marshmallows.
- Nutella: For chocolate lovers who also want a touch of hazelnut.
- Spices: Cinnamon, pumpkin spice, or even a dash of nutmeg can add warmth and depth.
- Extracts: Swap out vanilla for almond, coconut, or even peppermint extract for seasonal flair.
With these substitution ideas, you can make your Baked Rice Krispy Treats unique every single time. Whether you’re experimenting with cereals, going dairy-free, or adding bold new flavors, there’s no wrong way to enjoy this classic dessert with a baked twist.
Variations to Try
One of the most enjoyable parts of making Baked Rice Krispy Treats is how easy they are to customize. With just a few extra ingredients, you can completely change their flavor, look, and even the occasion they’re meant for. Whether you’re baking for a holiday, a birthday, or just experimenting in the kitchen, these creative variations will help your bars stand out.
Chocolate Drizzle
After your bars have cooled, melt ½ cup of chocolate chips (milk, dark, or white) and drizzle the melted chocolate over the top. For an extra indulgent touch, add a sprinkle of sea salt before the chocolate sets.
Peanut Butter Lovers
Stir ½ cup of creamy peanut butter into the melted marshmallow mixture before adding the cereal. This gives your treats a nutty richness that pairs perfectly with the sweet marshmallow flavor. You can also press a few mini peanut butter cups into the top before baking for a double hit of peanut butter goodness.
Cookies & Cream
Fold in a handful of crushed Oreo cookies along with the Rice Krispies cereal. The cream filling melts slightly, blending into the marshmallows, while the cookie pieces add crunch and chocolatey flavor.
S’mores Style
Bring the campfire indoors by adding mini chocolate chips and graham cracker crumbs along with your cereal. For an extra s’mores effect, sprinkle a few extra marshmallows on top before baking so they toast lightly in the oven.
Festive Sprinkle Bars
Add colorful sprinkles to the mixture before pressing into the pan. They’re perfect for birthdays, holidays, or any celebration. You can even tailor the sprinkles to match seasonal themes—red and green for Christmas, pastels for Easter, or orange and black for Halloween.
Fruity Fun
Swap out half of the Rice Krispies for Fruity Pebbles or Trix cereal. The bright colors make these bars look party-ready, and the fruity flavor makes them even more kid-friendly.
Salted Caramel Twist
Drizzle warm salted caramel sauce over the baked bars and let it set before slicing. This variation turns your Baked Rice Krispy Treats into a gourmet-style dessert with a sweet-and-salty balance.
Trail Mix Bars
Mix in nuts, dried fruit, and a few chocolate candies for a trail mix-inspired bar. These work great as on-the-go snacks since they’re a little heartier and packed with flavor.
Holiday Peppermint
For a winter twist, crush a few candy canes and sprinkle them over the top of your bars before the chocolate drizzle sets. This creates festive, minty treats that are perfect for Christmas gatherings.
Birthday Cake Bars
Fold ¼ cup of cake mix powder (like funfetti or vanilla) into the marshmallow mixture before adding the cereal. Top with sprinkles for a dessert that tastes just like birthday cake in Rice Krispy Treat form.
With so many options, you’ll never get bored of making Baked Rice Krispy Treats. Whether you prefer classic chocolate drizzle, a peanut butter upgrade, or a seasonal holiday twist, there’s a variation here for every craving and every occasion.
Storage Instructions
To keep your Baked Rice Krispy Treats fresh:
- Room temperature: Store in an airtight container for up to 3 days.
- Refrigerator: Keeps for up to 1 week, though they may firm up a bit.
- Freezer: Wrap individual squares tightly in plastic wrap, then place them in a freezer-safe bag. They’ll keep for up to 2 months. Just thaw at room temperature before eating.
Prep Time, Cook Time, and Servings
- Prep Time: 15 minutes
- Cook Time: 10–12 minutes
- Total Time: About 30 minutes
- Servings: 12 large bars or 24 smaller squares
Why Bake Rice Krispy Treats Instead of Just Mixing?
Traditional Rice Krispy Treats are no-bake, but baking them adds an extra layer of flavor and structure. The oven lightly toasts the marshmallows, giving the treats a caramelized edge while keeping the centers gooey. They also hold their shape better, making them perfect for packing in lunchboxes or bringing to parties.
Conclusion
If you’re looking for a sweet, nostalgic treat with a fun twist, Baked Rice Krispy Treats are the perfect recipe to try. Unlike the classic no-bake version, these baked bars offer a slightly crisp edge while keeping that soft, gooey marshmallow center we all know and love. The baking step transforms this childhood favorite into a dessert that feels just a little more elevated while still being incredibly easy to make.
What makes Baked Rice Krispy Treats so special is their versatility. You can keep them simple with the classic cereal-and-marshmallow combo, or you can dress them up with chocolate drizzles, sprinkles, or even a swirl of peanut butter. They’re great for birthday parties, holiday gatherings, bake sales, or simply as an after-school snack. Plus, they store well, which means you can make them ahead of time and enjoy them for days.
Another reason to love this recipe is how beginner-friendly it is. Whether you’re baking with kids, whipping up a batch for friends, or just craving something sweet for yourself, these Baked Rice Krispy Treats deliver every single time. With just a handful of ingredients and less than 30 minutes of effort, you’ll have a dessert that’s chewy, gooey, slightly toasty, and absolutely irresistible.
So, the next time you want to bring a crowd-pleasing dessert to the table, don’t settle for ordinary bars. Bake your Rice Krispy Treats and discover just how much better they can be. Once you try them, you’ll never go back to making them the old way.