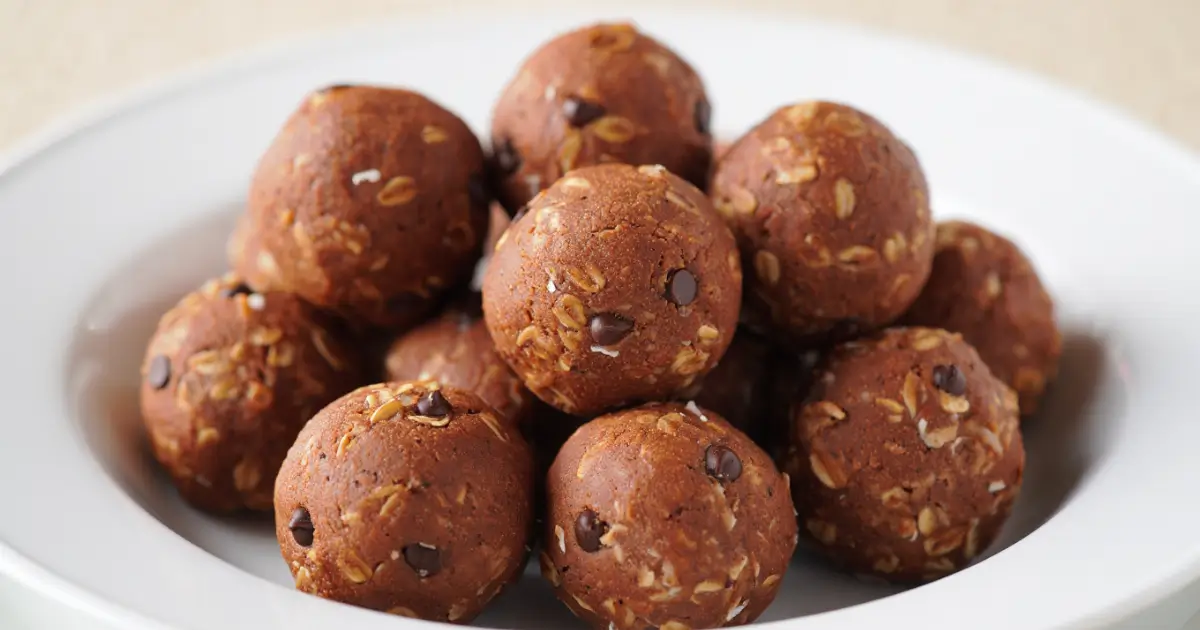
Chocolate Protein Balls Recipe – The Perfect Snack
If you’ve ever wished for a snack that tastes like dessert but fuels your body like a protein-packed energy booster, Chocolate Protein Balls are exactly what you’ve been searching for. These bite-sized, no-bake treats are rich, chocolatey, and satisfying while also being easy to make in just minutes. They’re perfect for busy mornings, post-workout refueling, or even a healthy dessert alternative.
What makes this recipe so great is its balance of flavor, texture, and nutrition. We’re talking about a chewy, slightly fudgy center that bursts with cocoa flavor—without the guilt that comes with traditional sweets. Best of all, you don’t need any fancy equipment or advanced cooking skills. If you can mix ingredients in a bowl and roll them into little balls, you can master this recipe.
In this guide, I’ll walk you through everything you need to know: from the essential ingredients and step-by-step instructions to expert tips, variations, and storage advice—so you can enjoy Chocolate Protein Balls whenever the craving strikes.
Table of Contents
Why You’ll Love These Chocolate Protein Balls
There’s no shortage of protein snack recipes out there, but these Chocolate Protein Balls check all the boxes:
- Quick and Easy: Ready in under 15 minutes with no baking required.
- Nutritious: Packed with protein, healthy fats, and fiber to keep you full longer.
- Portable: Perfect for taking to work, the gym, school, or on road trips.
- Customizable: You can swap ingredients based on your taste or dietary needs.
- Delicious: Rich cocoa flavor without refined sugar overload.
Ingredients (Chocolate Protein Balls Recipe)
Here’s what you’ll need to make about 16-18 protein balls. All measurements are provided so you can get consistent results every time.
Dry Ingredients:
- 1 cup rolled oats (old-fashioned or quick oats)
- 1/2 cup chocolate protein powder (whey, plant-based, or your preferred type)
- 1/4 cup unsweetened cocoa powder
- 2 tablespoons chia seeds or ground flaxseeds (for fiber and binding)
Wet Ingredients:
- 1/2 cup natural peanut butter (or almond butter for a milder flavor)
- 1/3 cup honey or pure maple syrup
- 2 teaspoons pure vanilla extract
- 2–4 tablespoons water or unsweetened almond milk (as needed for texture)
Optional Add-Ins:
- 1/4 cup dark chocolate chips or mini chips
- 2 tablespoons shredded unsweetened coconut
- 1 tablespoon hemp seeds for extra protein
Step-by-Step Instructions
Follow these steps to make perfect Chocolate Protein Balls every time.
Step 1: Prepare Your Mixing Bowl
Grab a large mixing bowl so you have plenty of space to stir everything together without spilling. This also makes it easier to get an even distribution of flavors.
Step 2: Combine the Dry Ingredients
Add the rolled oats, protein powder, cocoa powder, and chia seeds to the bowl. Stir well to combine. This ensures the cocoa and protein powder are evenly distributed before adding the sticky wet ingredients.
Pro Tip: Sift the cocoa powder first to avoid clumps—it makes a difference in texture.
Step 3: Mix the Wet Ingredients Separately
In a smaller bowl, combine the peanut butter, honey (or maple syrup), and vanilla extract. Stir until smooth and well-blended. If your nut butter is very thick, you can microwave it for 10–15 seconds to soften it.
Step 4: Combine Wet and Dry Mixtures
Pour the wet mixture into the dry ingredients. Use a sturdy spoon or spatula to mix everything together. The dough should be thick but slightly sticky.
Step 5: Adjust the Texture
If the mixture feels too dry and crumbly, add water or almond milk one tablespoon at a time until it comes together. If it’s too wet, sprinkle in a little more oats or protein powder.
Step 6: Fold in Optional Add-Ins
This is where you can get creative. Add chocolate chips, coconut, hemp seeds, or even dried fruit. Fold them gently into the mixture until evenly distributed.
Step 7: Roll Into Balls
Using clean hands or a small cookie scoop, roll the mixture into 1-inch balls. Place them on a parchment-lined tray or plate so they don’t stick.
Step 8: Chill and Set
Refrigerate the balls for at least 30 minutes before eating. This helps them firm up and makes them easier to store.

Tips for the Best Chocolate Protein Balls
These tips will help take your protein balls from good to irresistible:
- Choose a High-Quality Protein Powder
The flavor of your protein powder will affect the final taste. Go for a chocolate or unflavored variety with minimal artificial sweeteners. - Don’t Skip the Binding Ingredient
Peanut butter or almond butter is key for holding everything together. For a nut-free option, sunflower seed butter works well. - Sweetness Level is Flexible
You can adjust honey or maple syrup to your preference. For a low-sugar version, use a sugar-free sweetener like monk fruit syrup. - Make Them Uniform
Use a cookie scoop to keep the balls the same size. This ensures even nutrition per serving. - Batch Prep for the Week
Double the recipe and store extras in the freezer for easy grab-and-go snacks.
Ingredient Substitutions
One of the best things about Chocolate Protein Balls is how flexible they are. You can swap out ingredients to fit your taste, dietary needs, or simply what you have in your pantry. Here are some easy and effective substitutions:
- Oats: If you’re avoiding grains or just want a different texture, replace rolled oats with quinoa flakes or finely chopped nuts such as almonds, walnuts, or pecans. These will add a slightly richer, nuttier flavor.
- Protein Powder: If you don’t have protein powder or want a different source, use collagen powder for added joint and skin benefits. You can also skip it and add extra cocoa powder for a lighter protein snack.
- Nut Butter: For a nut-free version, sunflower seed butter works beautifully and has a mild, toasty taste. Tahini can also be used for a slightly earthy flavor.
- Sweetener: Instead of honey or maple syrup, try date syrup for a caramel-like sweetness or blend pitted medjool dates with a splash of water to create a natural sweet paste.
- Cocoa Powder: Swap with cacao powder for a deeper, slightly more bitter chocolate flavor with extra antioxidants.
Flavor Variations
Once you master the basic recipe, you can easily customize it to create endless variations. Here are some tasty ideas:
- Mocha Protein Balls: Add 1 teaspoon instant coffee or espresso powder to the dry ingredients for a coffee-chocolate kick.
- Mint Chocolate Protein Balls: Add 1/4 teaspoon peppermint extract for a refreshing, dessert-like flavor.
- Peanut Butter Cup Balls: Use peanut butter protein powder and fold in chopped peanuts for a candy-inspired twist.
- Almond Joy Balls: Add chopped almonds and shredded coconut for a tropical chocolate treat.
- Berry Chocolate Balls: Fold in dried cranberries or freeze-dried raspberries for a fruity burst in every bite.
Storage Instructions
The beauty of Chocolate Protein Balls is how well they store, making them a true make-ahead snack.
- Refrigerator: Store in an airtight container for up to 7 days. This keeps them fresh and maintains their chewy texture.
- Freezer: Freeze on a baking sheet in a single layer until solid, then transfer to a freezer-safe bag or container. They’ll last up to 3 months without losing flavor or texture.
- Grab-and-Go Tip: Wrap each ball in parchment paper or store them in small snack containers so you can easily toss them into lunchboxes, gym bags, or work totes.
Prep Time, Cook Time, and Servings
- Prep Time: 10 minutes
- Cook Time: 0 minutes (no-bake recipe)
- Total Time: 10 minutes
- Servings: 16–18 balls
- Serving Size: 1 ball
Nutritional Information (Per Serving)
Note: Nutrition values will vary based on the protein powder and specific brands you use.
- Calories: ~110
- Protein: 5–7g
- Carbohydrates: 12g
- Fat: 5g
- Fiber: 2g
- Sugar: 5g
Conclusion (Chocolate Protein Balls Recipe)
These Chocolate Protein Balls prove that healthy snacking doesn’t have to be boring—or complicated. In fact, they’re the kind of recipe that fits seamlessly into any lifestyle. With just a few pantry staples, you can have a batch ready in minutes, giving you a week’s worth of nutritious, portable fuel that’s as satisfying as it is wholesome.
Their rich cocoa flavor and chewy texture make them feel like a treat, yet they’re loaded with protein, fiber, and healthy fats to keep your energy levels steady. And because they’re no-bake, you don’t need to worry about turning on the oven or spending hours in the kitchen—making them ideal for busy mornings, after-school snacks, or late-night cravings.
One of the best things about this recipe is its versatility. You can tailor the flavor profile with different add-ins—think coconut for tropical vibes, coffee powder for a mocha kick, or dried berries for a fruity twist. You can even adjust the sweetness, choose your favorite nut butter, or experiment with various protein powders to suit your dietary preferences.
Whether you need a pre-workout boost, a mid-afternoon pick-me-up, or a healthy dessert option, these little bites have you covered. They store beautifully in both the fridge and freezer, meaning you’ll always have a stash ready for when hunger strikes.
Make them once, and you’ll quickly understand why they become a go-to recipe in so many kitchens. They’re proof that the best snacks can be both delicious and nourishing—a true win-win for your taste buds and your health.