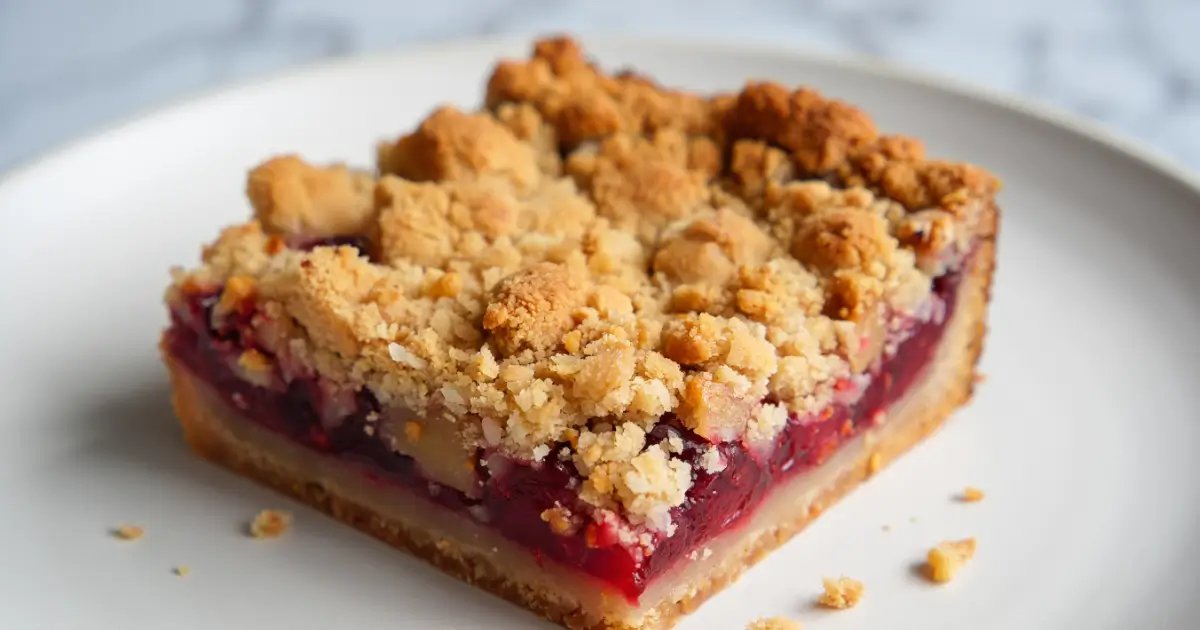
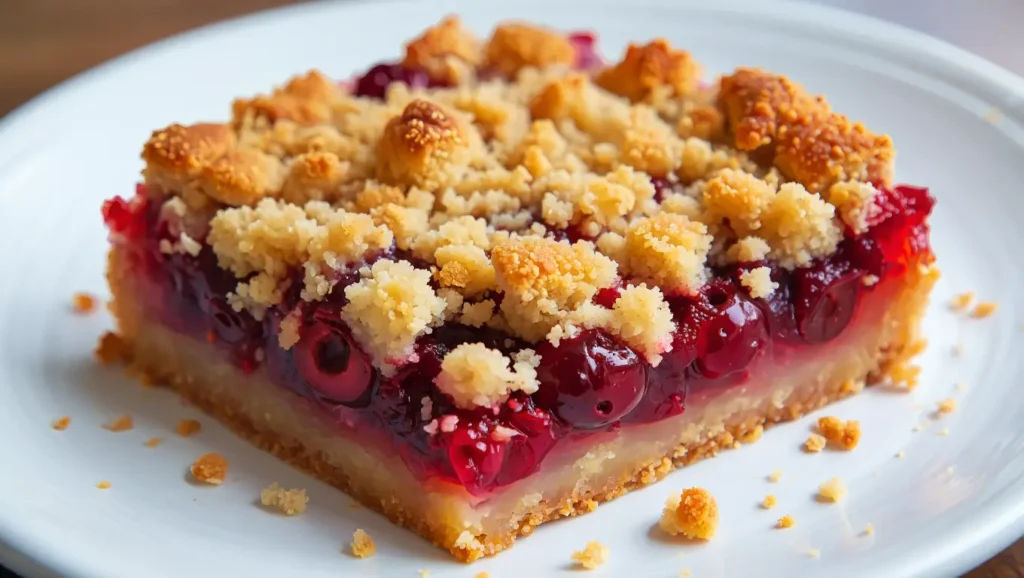
Easy Fresh Cherry Crumb Bars Recipe
When summer rolls around, there’s nothing better than baking with ripe, juicy cherries. That’s where Fresh Cherry Crumb Bars come in. They’re the perfect combination of a buttery shortbread-like crust, a jammy cherry filling, and a golden crumb topping that melts in your mouth.
These bars strike the balance between rustic comfort and elegant dessert. They’re ideal for summer picnics, family gatherings, or simply as a sweet snack with your afternoon coffee. Unlike store-bought desserts, these homemade bars let the flavor of fresh cherries shine through, giving you a dessert that’s both wholesome and indulgent.
If you’re looking for a versatile dessert that’s easy to make, crowd-pleasing, and bursting with seasonal flavor, this recipe is going to be one of your new favorites.
Table of Contents
Ingredients for Fresh Cherry Crumb Bars
Here’s everything you’ll need to make these delicious bars. The recipe uses simple pantry staples and, of course, fresh cherries as the star ingredient.
For the crust and topping:
- 2 ½ cups all-purpose flour
- 1 cup granulated sugar
- 1 teaspoon baking powder
- ½ teaspoon salt
- 1 cup (2 sticks) unsalted butter, cold and cubed
- 1 large egg
- 1 teaspoon vanilla extract
For the cherry filling:
- 4 cups fresh cherries, pitted and halved
- ½ cup granulated sugar
- 3 tablespoons cornstarch
- 2 teaspoons lemon juice
- 1 teaspoon lemon zest
- 1 teaspoon vanilla extract
Step-by-Step Instructions for Fresh Cherry Crumb Bars
Making Fresh Cherry Crumb Bars is easier than you think. Here’s a step-by-step breakdown to guide you through the process:
Step 1: Prep your cherries
Wash, pit, and halve your cherries. If you don’t have a cherry pitter, you can carefully use a small knife. Place the prepared cherries in a bowl and toss them with sugar, cornstarch, lemon juice, zest, and vanilla extract. This mixture will thicken as it bakes, creating a luscious cherry layer.
Step 2: Make the crust and crumb topping
In a large mixing bowl, whisk together the flour, sugar, baking powder, and salt. Add in the cold butter cubes and cut them into the mixture using a pastry cutter or your hands until it resembles coarse crumbs. Stir in the egg and vanilla. The mixture should be crumbly but hold together when pressed.
Step 3: Build the base
Preheat your oven to 350°F (175°C). Grease or line a 9×13-inch baking dish with parchment paper. Press about two-thirds of the crumb mixture firmly into the bottom of the pan to form an even crust.
Step 4: Add the cherry filling
Spread the cherry mixture evenly over the crust. Be sure to get cherries into every corner so each bite has fruit in it.
Step 5: Top with crumbs
Sprinkle the remaining crumb mixture evenly over the cherries. It doesn’t have to be perfect—uneven crumbs give the bars their rustic charm.
Step 6: Bake
Place the pan in the oven and bake for 40–45 minutes, or until the topping is golden brown and the cherry filling is bubbling.
Step 7: Cool and slice
Let the bars cool completely in the pan before cutting them into squares or rectangles. This cooling step is important, as it helps the filling set.
Tips and Tricks for the Best Fresh Cherry Crumb Bars
Baking Fresh Cherry Crumb Bars is simple, but a few little tricks can make them turn out bakery-quality every single time. Keep these tips in mind as you bake:
- Chill the butter: Cold butter is essential for achieving that classic crumbly, shortbread-like texture in both the crust and the topping. If your butter has softened too much, place it back in the fridge for at least 10 minutes before cutting it into the flour mixture.
- Don’t skip the lemon: Fresh lemon juice and zest aren’t just an extra touch—they’re what brighten the cherry filling and balance the natural sweetness of the fruit. Without it, the bars may taste flat.
- Line the pan with parchment paper: Not only does this prevent sticking, but it also makes removing the bars from the pan much easier. You’ll get cleaner cuts and less mess when lifting the whole slab out for slicing.
- Cool completely before slicing: Patience pays off here. Allow the bars to cool fully in the pan before cutting. This helps the cherry filling firm up so your squares hold their shape instead of falling apart.
- Use a sharp knife (and clean it between cuts): A clean, sharp knife ensures neat slices. Wipe the blade with a damp cloth or paper towel between cuts to keep the edges tidy.
- Make ahead for convenience: These bars taste even better the next day once the flavors have melded, so they’re perfect for preparing in advance.
Variations to Try
One of the best things about Fresh Cherry Crumb Bars is how easy it is to customize them. Once you’ve mastered the basic recipe, you can switch things up depending on what you have in your kitchen or the flavors you love most. Here are some fun and tasty variations to inspire you:
- Mixed Berry Crumb Bars: Swap out half of the cherries for blueberries, raspberries, or blackberries. The mix of flavors and colors makes the bars extra vibrant and perfect for summer gatherings.
- Almond Twist: Add ½ teaspoon of almond extract to the cherry filling for a subtle nutty flavor that pairs beautifully with cherries. For even more texture, sprinkle sliced almonds over the crumb topping before baking.
- Coconut Crumble: Stir ½ cup of unsweetened shredded coconut into the crumb mixture. It adds a tropical flair and a bit of chewy texture to the topping that makes the bars even more irresistible.
- Gluten-Free Option: Replace the all-purpose flour with a 1:1 gluten-free flour blend. The buttery, crumbly texture will stay the same, and everyone can enjoy a slice—no matter their dietary needs.
- Spiced Version: Add ½ teaspoon ground cinnamon (or a pinch of nutmeg) to the cherry filling. This cozy variation is especially delicious in cooler months, giving the bars a warm, spiced flavor.
- Chocolate Drizzle: Melt a little dark chocolate and drizzle it over the cooled bars for an indulgent finishing touch. Chocolate and cherries are a match made in heaven.
- Citrus Boost: Replace the lemon zest with orange zest for a slightly sweeter, more aromatic citrus note.
Ingredient Substitutions
Don’t worry if you don’t have every ingredient on hand. Here are some simple swaps:
- Fresh cherries: Frozen cherries (thawed and drained) work well when fresh aren’t available.
- Granulated sugar: Light brown sugar can be used in the crumb mixture for a deeper flavor.
- Butter: For a dairy-free version, substitute with coconut oil or vegan butter.
- Cornstarch: Arrowroot powder or tapioca starch can also thicken the filling.
Storage Instructions
These bars store beautifully, making them great for preparing ahead of time.
- Room temperature: Keep in an airtight container for up to 2 days.
- Refrigerator: Store in the fridge for up to 5 days. They taste great chilled!
- Freezer: Wrap bars individually in plastic wrap, then place them in a freezer-safe container. Freeze for up to 3 months. Thaw at room temperature before serving.
Prep Time, Cook Time, and Servings
- Prep time: 20 minutes
- Cook time: 45 minutes
- Total time: 1 hour 5 minutes
- Servings: About 16 bars
Conclusion (Fresh Cherry Crumb Bars Recipe)
If you’re craving a homemade treat that feels both nostalgic and indulgent, Fresh Cherry Crumb Bars are the dessert to make. They capture everything we love about summer baking: juicy fruit, buttery crumbs, and a balance of sweet and tart flavors that keep you coming back for more. With their rustic charm and melt-in-your-mouth texture, these bars are a dessert you’ll want to make again and again.
The beauty of Fresh Cherry Crumb Bars is that they’re so versatile. They can be dressed up for a dinner party with a scoop of vanilla ice cream, packed into lunchboxes for a fruity snack, or simply enjoyed with a cup of coffee in the afternoon. You can also adapt them to the seasons by trying different fruits—apples in the fall, cranberries in the winter, or peaches in the spring—while keeping the same crumbly, buttery base that makes them irresistible.
Beyond flavor, these bars are also practical. They store well, travel well, and can be frozen for later, making them a smart choice for busy families and home bakers. If you’re someone who loves to bake but doesn’t want to fuss with complicated recipes, this one will quickly become a go-to.
In the end, there’s something comforting about pulling a pan of Fresh Cherry Crumb Bars out of the oven. The bubbling fruit, the golden topping, and the sweet aroma filling your kitchen create the kind of memory that sticks. Whether you serve them at a summer barbecue, share them at a potluck, or keep them all to yourself (we won’t tell), these bars are proof that simple ingredients can come together to make something truly special.
So next time cherries are in season, don’t hesitate—head to the kitchen and bake a batch of Fresh Cherry Crumb Bars. It’s a recipe you’ll treasure, and one your friends and family will be asking for again and again.